Especially in affiliate marketing, where the outbound link is essentially your product, tracking your outbound links is important and gives you useful information. Basically for an affiliate, getting a user out of the website is the goal of the affiliate site so by tracking links you get to see how many people you send from your website.
If you aren’t in the affiliate business, it might be still worth tracking the outbound links as well as links in general. With this information, you get to see, what are your websites hotspots when it comes to links and what information was something the visitors were interested to learn more about. But first a quick look into what is Google Tag Manager or GTM.
What is Google Tag Manager?
Tag Manager is a free analytics tool from Google that makes controlling tags easier for web analysts, online marketers and many others that are involved with web analytics on a regular basis. Tags can be website analytics (page views), clicks for event tracking and many other things measuring something happening on the site or application.
Key benefit in using Google Tag Manager is that you won’t need to add any other tracking code apart from the Tag Manager’s code. All tags such as Universal Analytics are added through Tag Manager by creating a new tag and a trigger that launches the tag. Tag Manager also supports third party tracking, such as Hotjar for example. Learn more on how tag manager works.
How to install Google Tag Manager
Should I switch to tag manager?
For all, tag manager isn’t necessary and there isn’t a need to switch. For example, if you are only using Google Analytics and have already made the necessary trackings in your code or don’t have anything special except for the basic analytics data, Tag Manager does not really add anything to that. However, if you are planning on adding additional tracking, switching to tag manager may make your life easier in the future and the installation isn’t that difficult – Tag manager installation guide. For larger websites, where there are multiple tracking methods removed and added on a regular basis, Tag Manager will reduce workload in the long run, as there is less time required from developers. However, migrating from a website that already has complex tracking implemented will grow some gray hairs for sure.
Three benefits of tag manager
- Biggest benefit is that it reduces the time needed from developers as there is only one tracking code required to add on the site. This assuming that you have separate analytics team. Of course, if your developers are also in charge of reporting the analytics data, you will just introduce a new tool to them.
- Besides having only one tracking code on the site, the other benefit is easy testing. In Google Tag Manager, you can preview the changes before deploying them live. Enter test mode and go to your website. Panel will pop up at the bottom of the page, where you can see what tags are being fired. If the triggers work
- Third benefit with Tag Manager is version control. If you have used something like git before, you will be very pleased on how the Tag Manager works. You can see a version history and easily go back in time, if something brakes.
Tracking outbound links
Configure variables
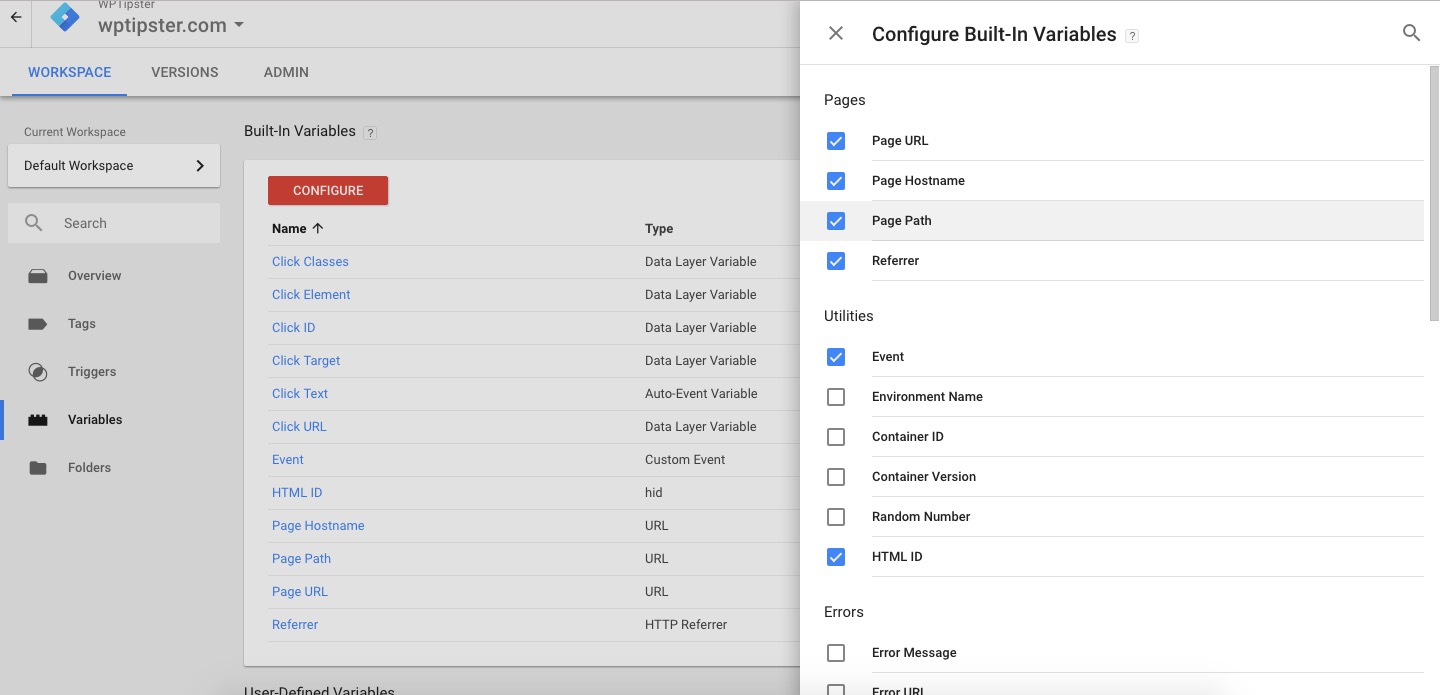
If you haven’t already added more variables to the default settings, chances are that you won’t have the necessary variables yet available to set up the tracking for the outbound links. If this is the case, add variables by going to variables -> configure and checking all the checkbox. While we aren’t needing all of them yet, you might as well just check all as it won’t really do any harm either to have all of them available.

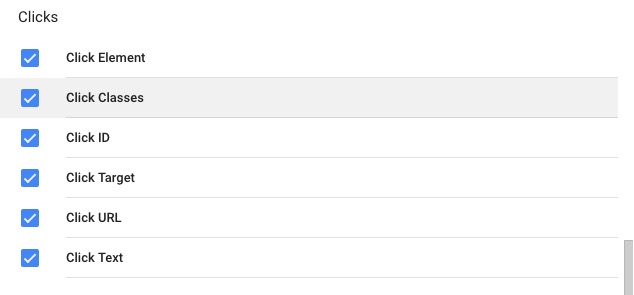
At least make sure you have all the clicks enabled.

Create a new tag
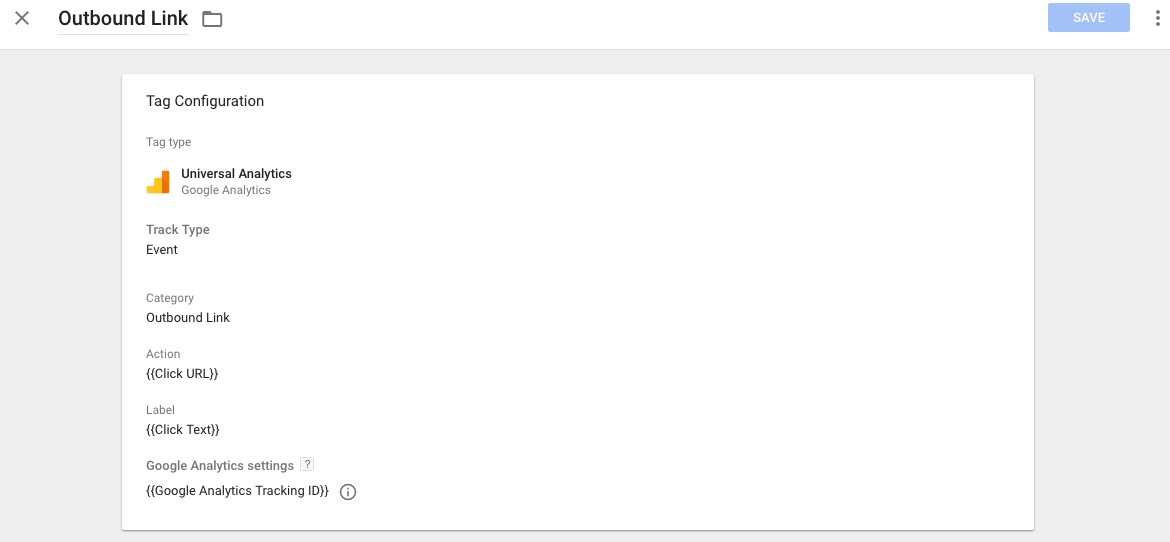
Click to create a new tag and select the following settings.

Create a trigger
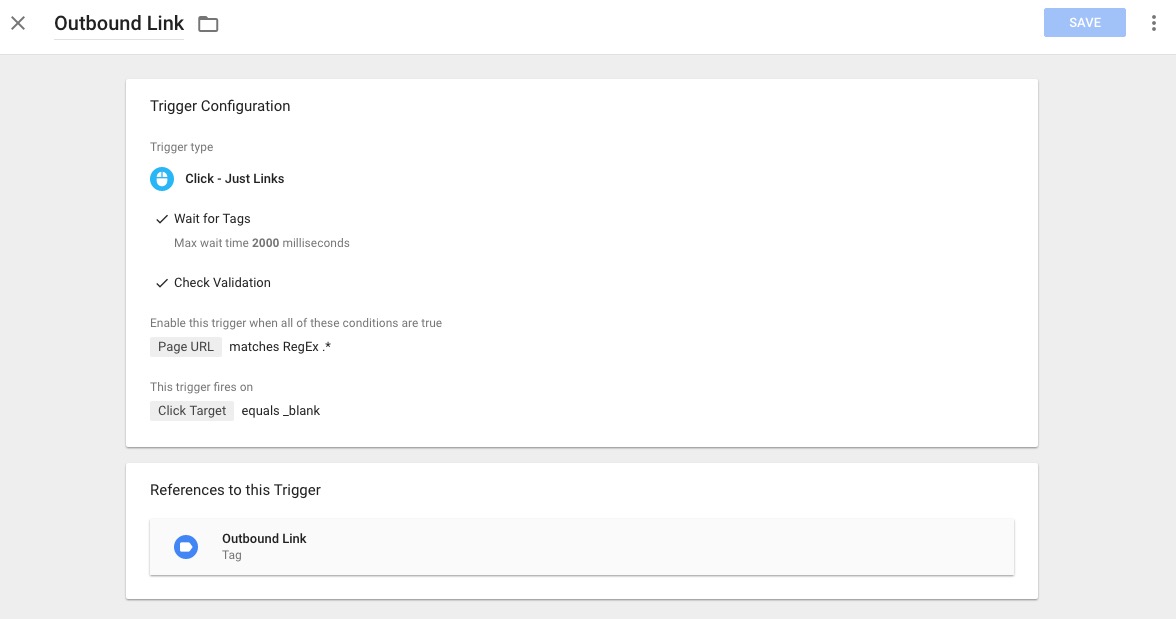
Now we need to create a trigger for the tag. Something that fires the tag we have created. Since we want our trigger to be fired on external links only, we have set a rule that fires the trigger only when the click target is blank.

Since WPTipster has cloaked affiliate links on the site, it uses the target blank to separate the outbound links from internal links. A cloaked link is basically an internal link that is redirected. Cloaking links is done for SEO purposes. Because of this, variables like pathname cannot be used as it would not track the most important thing WPTipster is interested in tracking, affiliate links. Check what plugin to use for link cloaking.
Preview and test that the tracking is working
Head back to the overview page and click the preview button. This will allow you to preview the tags on your site. Sometimes new tracking may interfere with other scripts and cause parts of the code to break. Because of this, it is always good to preview the new changes before submitting them live.
After you have entered the preview mode, go to your site where you want to set up the link tracking. If you click an outbound link, you should be able to see in the preview bar whether the tag was the triggered. If it was fired, test that the new tracking did not break anything on your page and that inner links aren’t triggering the tag. If everything works as it should, you are ready to submit the new version.
Submit changes
Assuming everything went well in the preview mode, you are now ready to deploy the new tag. Click on submit and write a brief description of what has changed in the new version. If you are familiar with version control such as git, this phase should be quite self-explanatory. After deploy, double check that everything is working. Now you are ready to track your outbound links. This data will be displayed in your Analytics account under Events.
Banner icon: Designed by Freepik


